Deploying on microk8s
Now that the preflight changes have been done, let's take a look at how we will deploy to microK8s.
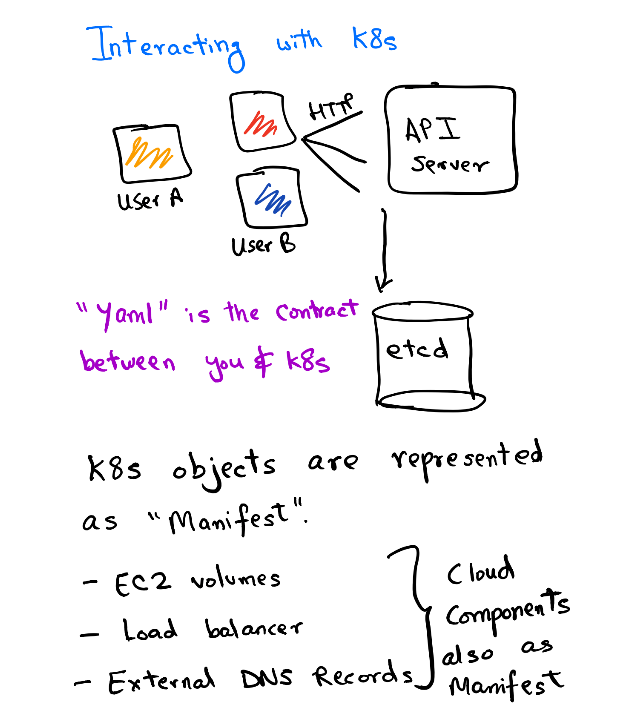
Kubernetes has an API server deployed in its control plane. This API server is responsible for making changes in the cluster. The API server is like the gateway to your cluster and all the updates can be managed with this. kubectl is a nifty wrapper for making HTTP calls to this API. In this section, we'll see how we declaratively apply changes to our cluster to get our app running.
Step 1: Create a namespace
We need to create a namespace object. Namespace refers to a virtual cluster in Kubernetes. Since Kubernetes is a multi-tenant platform where multiple workloads are deployed, we need a layer of separation. Namespace acts as a virtual separation but remembers it does not mean isolation in terms of scheduling. You can set resource limits to a namespace, manage all the resources of an app collectively with one namespace, set network policies on the namespace, etc, set proper RBAC for teams to access a particular Namespace and restrict their actions as well.
Note: If you don't specify any namespace,
defaultnamespace is used. In production clusters, this is a very bad idea as you don't want to mix arbitrary workloads under one namespace.
# vim overlays/local/namespace.yml
apiVersion: v1
kind: Namespace
metadata:
  name: listmonk-local
# cwd listmonk-base-deployment
microk8s.kubectl apply -f overlays/local/namespace.yml
A namespace should have been created with the name listmonk-local. You can verify the same if it's created by:
microk8s.kubectl get namespace
Step 2: Build and apply manifest
kustomize build overlays/local | microk8s.kubectl apply -f -
The resources are now applied in the cluster. You can see the status of pods by:
$ microk8s.kubectl get pods -n listmonk-local
NAME                       READY   STATUS    RESTARTS   AGE
api-dev-5954dbc8fb-2242w   1/1     Running   0          4d
api-dev-5954dbc8fb-99vwx   1/1     Running   0          4d
api-dev-5954dbc8fb-nbm7j   1/1     Running   0          4d
Step 3: Verifying the changes
Get the pod status
microk8s.kubectl get pods -n listmonk-local
Get deployment logs
microk8s.kubectl logs deployment/listmonk-app-local -n listmonk-local

2020/03/28 09:36:12 main.go:89: reading config: /etc/listmonk/config.toml
2020/03/28 09:36:13 init.go:209: loaded SMTP: my0 (xxxxx@my.smtp.server)
2020/03/28 09:36:13 init.go:197: skipped SMTP: postal
⇨ http server started on [::]:9000
Yay! We can see listmonk is running successfully in the logs.
Get Service details
microk8s.kubectl get service -n listmonk-local
Note: It's important to use
--namespace/-nflag with everykubectlcommand if you don't set the namespace in yourcurrent-context. By default, thedefaultnamespace is set in thecurrent-context, so you can set it tolistmonk-localto avoid passing the flag-nfor your convenience too.
Further Steps
You can explore other kubectl commands here.
Head over to read the final note.